How to Color Match Grout: A Step-by-Step Guide
Table of Contents
- Why Color Matching Grout Matters
- Understanding Your Current Grout: Identifying Color and Condition
- Factors That Influence Your Grout Color Choice
- How to Test Grout Color Samples Before Committing
- How to Change Grout Color: Preparation and Planning
- Grout Colorant Application Tips for Professional Results
- Maintaining Your Color-Matched Grout Long-Term
- Conclusion
- Frequently Asked Questions
Last Updated: September 27, 2026
Why Color Matching Grout Matters
Your grout tells a story. It’s either the finishing touch that makes your tile work shine, or it’s the thing that makes you wince every time you look at your bathroom floor. The good news: you don’t have to live with grout that doesn’t match your vision, color match grout is easier than you think.
Color matching grout is the process of selecting or applying a grout color that either matches your existing grout or transforms it entirely to suit your design preferences. At Grout Shield Distributors, we’ve helped thousands of homeowners and contractors restore tired tile installations without the cost and hassle of complete regrouting.
Why does this matter? Discolored or mismatched grout makes even beautiful tile look neglected. It collects mold, stains, and years of grime. But fresh, properly color-matched grout can make your floors look brand new. Whether you’re preparing to sell, refreshing your home’s look, or simply tired of dark, stained grout lines, learning how to color match grout correctly saves you thousands in labor costs compared to full regrouting.
The stakes are real. A poorly matched grout color stands out immediately. A well-executed color match blends seamlessly with your tile and becomes invisible, in the best way possible.
The most common mistake homeowners make is choosing a grout color without testing it first on their actual tile. What looks perfect on a tiny swatch often looks completely different once applied to your full floor.
Understanding Your Current Grout: Identifying Color and Condition
Before you can match your grout, you need to understand what you’re working with. Grout comes in two main types: cementitious (traditional cement-based) and epoxy. Your existing grout’s color depends on its age, the pigments used, and how much staining or wear it’s experienced.
Start by examining your grout in natural daylight. Take photos from multiple angles. Artificial lighting distorts color perception dramatically, what looks gray under fluorescent lights might appear more tan or beige in natural sunlight. This is critical information you’ll need later.
Next, assess the grout’s condition:
- Surface staining: Mold, mildew, or mineral deposits that sit on top
- Deep discoloration: Stains that have penetrated into the grout itself
- Efflorescence: White, chalky deposits (common in older installations)
- Crumbling or loose grout: Indicates structural issues that may need regrouting rather than color matching
If your grout is actively crumbling or loose, color matching alone won’t solve the problem. You may need professional regrouting first. But if the grout is structurally sound and just discolored, color matching is your solution.
The condition of your grout also affects which colorant products will work best. Epoxy colorants bond differently to cementitious grout than acrylic-based colorants do. Understanding what type of grout you have, and its current condition, determines your application strategy.
If more than 25% of your grout joints are visibly crumbling or missing chunks, color matching won’t provide a lasting solution. Regrouting or professional restoration is necessary first.
Factors That Influence Your Grout Color Choice
Choosing the right grout color involves more than aesthetics. Several practical factors shape what will actually work in your space.
Lighting conditions have the biggest impact on how grout color appears. A color that looks perfect in your bright kitchen might look completely different in your low-light bathroom. Warm lighting (incandescent, sunset) makes grout appear more golden or orange-toned. Cool lighting (LED, fluorescent, north-facing windows) makes grout look more blue or gray. Visit your space at different times of day and note how the light changes.
Tile color and finish matter enormously. Glossy tiles reflect light differently than matte tiles. Light-colored tile makes dark grout lines more visible. Dark tile can swallow lighter grout colors. Consider whether you want contrast or continuity. A neutral grout color that matches the mid-tone of your tile creates a seamless look. A contrasting color (dark grout with light tile, or vice versa) creates visual definition and can highlight your tile pattern.
Grout joint width affects how much the grout color influences the overall appearance. Wide grout lines (1/4 inch or larger) are more visually prominent. Narrow grout lines (1/8 inch or less) recede into the background. If your grout lines are wide, the color choice matters more.
Sanded versus unsanded grout affects color application. Sanded grout (used for joints wider than 1/8 inch) has a porous, textured surface that accepts colorants differently than smooth, unsanded grout. The grout type you have determines which colorant products will adhere properly and last longest.
Maintenance expectations should influence your choice. Lighter grout colors show dirt and stains more readily. Darker colors hide stains but can look dated quickly. Mid-tone, neutral colors offer the best balance between aesthetics and practicality for most homeowners.
The goal is finding a color that complements your tile, works with your lighting, and fits your lifestyle.
How to Test Grout Color Samples Before Committing
Testing grout color samples is the single most important step in this process. This is where most homeowners either succeed or regret their choice.
Order color samples. Request samples in the specific colorant formula you’re considering, whether that’s acrylic-based, epoxy, or another type. Samples should be large enough (at least 4×6 inches) to show how the color reads across a larger area.
Apply samples directly to your grout lines in multiple locations:
Place An Order Online or Call 1-800-631-0716 →
- Choose three different areas of your floor or wall
- Clean the grout thoroughly with a damp cloth
- Apply the sample colorant according to product instructions
- Allow full curing time (typically 24-48 hours)
- Observe in natural light, artificial light, and at different times of day
This matters because lighting conditions change throughout the day. A color that looks perfect at 2 PM in bright sunlight might look completely different at 8 PM under your kitchen lights. Test over at least two days if possible.
Take photos of your samples in different lighting conditions. Use your phone’s camera, it often captures color more accurately than your eye does in the moment. Compare the photos side by side. This removes some of the guesswork from the decision.
Never rely on color swatches alone. The only way to know if a grout color will work is to see it applied to your actual grout, in your actual space, under your actual lighting.
If the sample color isn’t quite right, adjust and test again. It’s far cheaper to test multiple samples than to color match your entire floor and hate the result.
How to Change Grout Color: Preparation and Planning
Once you’ve chosen your grout color, preparation determines whether your color match lasts or fails prematurely.
Start with a thorough cleaning. Grout colorants bond best to clean surfaces. Remove all dirt, dust, mold, and mildew from the grout lines. A grout cleaner works better than general household cleaners. For stubborn stains, a grout brush or old toothbrush helps scrub the lines.
After cleaning, allow the grout to dry completely. Moisture prevents colorant adhesion. Wait at least 24 hours after cleaning before applying colorant, longer in humid conditions.
Assess your grout type and choose the right colorant formula:
- Cementitious grout with acrylic-based colorant: Best for DIY applications. Easier to apply, forgiving of mistakes, good color consistency
- Cementitious grout with epoxy colorant: More durable and stain-resistant. Requires more precision in application
- Sanded versus unsanded: Sanded grout accepts colorants readily. Unsanded grout requires a different formulation designed for smooth surfaces
Protect your tile before applying colorant. Colorant stains tile permanently. Use painter’s tape along the edges of your grout lines, or apply a protective coating to tile before colorant application to prevent staining.
Gather your tools: applicator brush, small paint tray, protective gloves, and clean cloths for wiping excess colorant.
Plan your application in sections. Don’t try to color match your entire floor in one day. Work in manageable areas (100-200 square feet at a time) so you can maintain consistent application technique and color consistency throughout.
Grout Colorant Application Tips for Professional Results
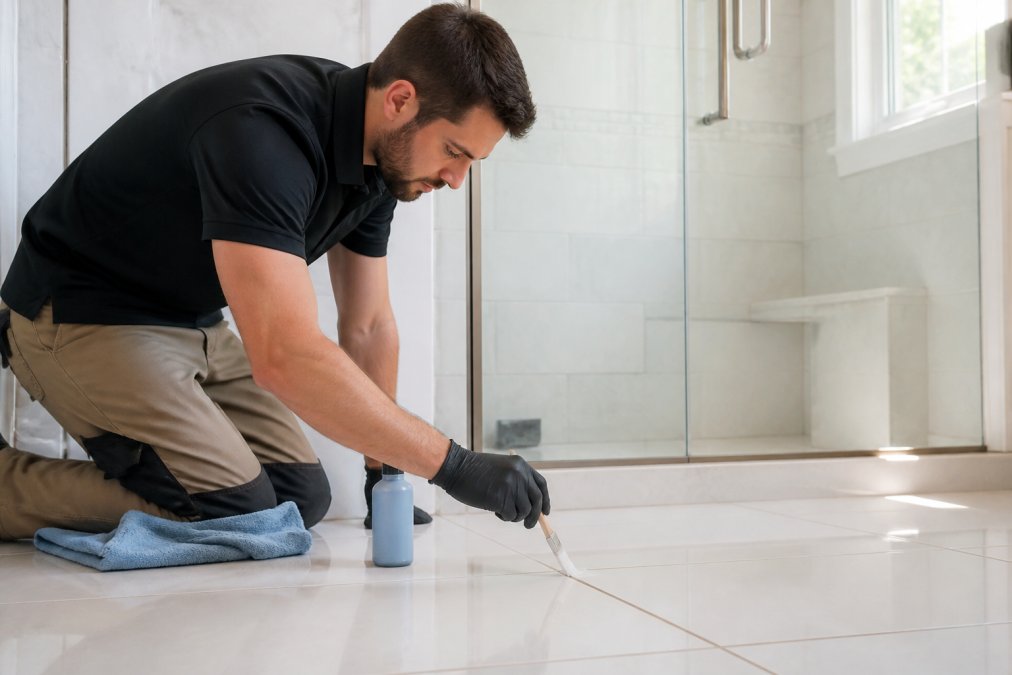
Applying grout colorant correctly is where most DIY attempts either succeed or fail. The technique matters more than the product.
Start with the right applicator. A small, stiff-bristled brush (1/4 to 1/2 inch wide) works best for most grout lines.
If you’re working with epoxy-based colorant, work even more slowly. Epoxy sets faster than acrylic and is less forgiving of mistakes. Some professionals recommend a two-person team for epoxy application, one person applies, the other wipes immediately.
Maintaining Your Color-Matched Grout Long-Term
Your color-matched grout won’t stay perfect forever. But proper maintenance extends its life significantly.
Conclusion
Color matching grout is one of the highest-impact, lowest-cost improvements you can make to tired tile surfaces. The process requires patience, testing samples, careful preparation, and precise application technique, but the results transform your space.
Frequently Asked Questions
How do I figure out what color my current grout is?
Take a clear photo in natural daylight and compare it to color swatches from your tile or grout manufacturer. Check the original paperwork from your installation if available. Grout color can appear different under artificial light, so photograph it at various times of day. If you’re unsure, professional-grade color-matching services like those offered by Grout Shield Distributors can help identify your exact shade.
Should grout be lighter or darker than my tile?
There’s no single rule, it depends on your aesthetic preference and tile type. Lighter grout with dark tile creates strong contrast and highlights the tile pattern. Darker grout with light tile minimizes visible grout lines and creates a seamless look. Neutral grout colors that match your tile offer a balanced, integrated appearance. Test samples in your actual space under your home’s lighting before deciding.
Can I color match grout that has faded or stained over time?
Yes, you can apply grout colorants over existing grout without full regrouting. First, deep clean the grout lines to remove mold, mildew, and stains. Depending on the colorant type, cementitious, acrylic-based, or epoxy, surface preparation varies. Some colorants work best on clean, slightly damp grout. Professional-grade colorants are designed to adhere to aged grout and provide durable, long-lasting color that resists future staining.
How do I know if a grout colorant will last, or if it’s just a cosmetic fix?
Look for colorants specifically formulated for durability and stain resistance. Professional-grade products designed for high-traffic areas like kitchens and bathrooms are engineered to cure hard and resist moisture, mildew, and fading. Pair colorants with a quality grout sealer to extend longevity. Curing time matters too, allow full curing before exposing the grout to water or heavy use. Grout Shield Distributors products are designed to last and maintain their appearance with proper application and maintenance.
The post How to Color Match Grout: A Step-by-Step Guide appeared first on Grout Shield | Grout Restoration System | Grout Cleaner.