Can You Paint Shower Grout? A Step-by-Step Guide
Table of Contents
- Can You Paint Shower Grout? What Actually Works
- How to Clean Grout Before Painting
- Tools Needed for Grout Restoration
- Grout Paint vs. Grout Stain: Which Should You Choose
- Step-by-Step Application Process
- How Long Does Grout Colorant Last
- Common Mistakes to Avoid
- Pros and Cons of Grout Paint vs. Re-Grouting
- Frequently Asked Questions
Last Updated: September 18, 2026
Can You Paint Shower Grout? What Actually Works
Yes, you can paint shower grout. It’s one of the most cost-effective ways to restore discolored or stained grout without the labor-intensive process of removing and replacing it entirely. The key is understanding what actually works and what doesn’t.
Grout paint and colorants are designed specifically for this purpose. They bond to existing grout lines and create a protective, water-resistant finish. The results can last for years when applied correctly, though durability depends heavily on surface preparation, application technique, and the product you choose.
Here’s what matters most: grout is porous. It absorbs water, dirt, and mold spores. Before any colorant goes on, that surface has to be clean, dry, and properly sealed. Skip this step and your paint will peel or flake within months. Do it right, and you’ll get a finish that holds up to shower moisture and daily use.
At Grout Shield Distributors, we’ve helped thousands of homeowners and contractors tackle this project. Whether you’re refreshing tired grout before selling your home or simply changing the color to match your bathroom redesign, the process is straightforward if you follow the right steps.
The most common mistake isn’t the paint itself, it’s skipping proper surface prep. Homeowners often apply colorant over grout that still contains mold, mildew, or soap residue. The paint bonds poorly and fails within weeks. Clean first, paint second.
How to Clean Grout Before Painting
Cleaning is not optional. It’s the foundation of everything that comes after. Dirty grout won’t hold paint. Period.
Start by identifying what you’re dealing with. Is it mold and mildew? Soap scum? Hard water stains? Grease? Different problems need different approaches, but the goal is the same: a clean, bare grout surface.
Removing Mold and Mildew
Mold and mildew thrive in damp shower environments (the CDC). They appear as black, green, or brown spots on grout lines. These need to be removed completely before any colorant is applied.
Mix a solution of equal parts white vinegar and water in a spray bottle. Spray the affected grout lines generously and let it sit for 10-15 minutes. The acidity breaks down mold without harsh chemicals. Scrub with a stiff brush, working the bristles into the grout lines. Rinse thoroughly with clean water.
For stubborn mold, make a paste of baking soda and water. Apply it directly to the grout, let it sit for 15 minutes, then scrub and rinse. This combination is gentler than bleach-based cleaners and still highly effective.
If mold returns quickly after cleaning, moisture is the underlying issue. Improve ventilation in your bathroom. Run the exhaust fan during and for 20 minutes after every shower. Wipe down shower walls and grout lines with a dry cloth after bathing. These habits prevent mold from coming back as aggressively.
Degreasing and Drying
Soap residue and body oils coat grout lines in shower environments. These create a slick surface that prevents paint from bonding properly. A degreaser removes this buildup.
Use a commercial degreaser designed for tile and grout, or make your own with dish soap and warm water. Apply it to the grout lines with a brush, let it work for 5-10 minutes, then scrub and rinse thoroughly. This step is critical. Many paint failures happen because homeowners skip degreasing.
After cleaning, the grout must be completely dry. Moisture trapped in the porous grout will cause paint to bubble, peel, or fail to cure properly. Wait at least 24-48 hours after cleaning before applying any primer or colorant. In humid climates, wait longer. Use a hair dryer on low heat to speed drying if needed, but allow the grout to air-dry fully afterward.
Applying paint to damp grout is one of the top reasons for premature peeling. Even grout that feels dry to the touch can contain moisture deep inside. Patience here saves frustration later.
Tools Needed for Grout Restoration
You don’t need many tools, but using the right ones makes the job easier and produces better results.
Essential tools:
- Stiff-bristled brush, for scrubbing grout lines during cleaning
- Grout pen or applicator brush, for precise application of colorant into grout lines
- Spray bottle, for applying cleaning solutions
- Drop cloth or plastic sheeting, to protect surrounding surfaces
- Rubber gloves, to protect your hands
- Tape, painter’s tape to mask off tile edges and create clean lines
- Small container, for mixing primer or colorant if needed
- Cloth or sponge, for wiping excess product
Optional but helpful:
- Caulk gun, if using a caulk-style grout colorant
- Small paint roller, for applying primer to larger grout areas
- Grout sealer applicator, a specialized brush designed for sealing grout
Having these tools ready before you start prevents delays and ensures a smoother application process.
Grout Paint vs. Grout Stain: Which Should You Choose
This decision affects both the appearance and longevity of your project. Understanding the differences helps you pick the right product.
Grout paint is thicker and more opaque. It creates a visible coating on top of the grout. Paint covers stains completely and offers more color options. It’s forgiving if application isn’t perfectly precise. The downside: paint can peel or flake if the surface prep isn’t perfect or if moisture gets trapped underneath.
Place An Order Online or Call 1-800-631-0716 →
Grout stain (or grout colorant) penetrates into the porous grout rather than sitting on top. It bonds at a molecular level, which creates a more durable finish.
Step-by-Step Application Process
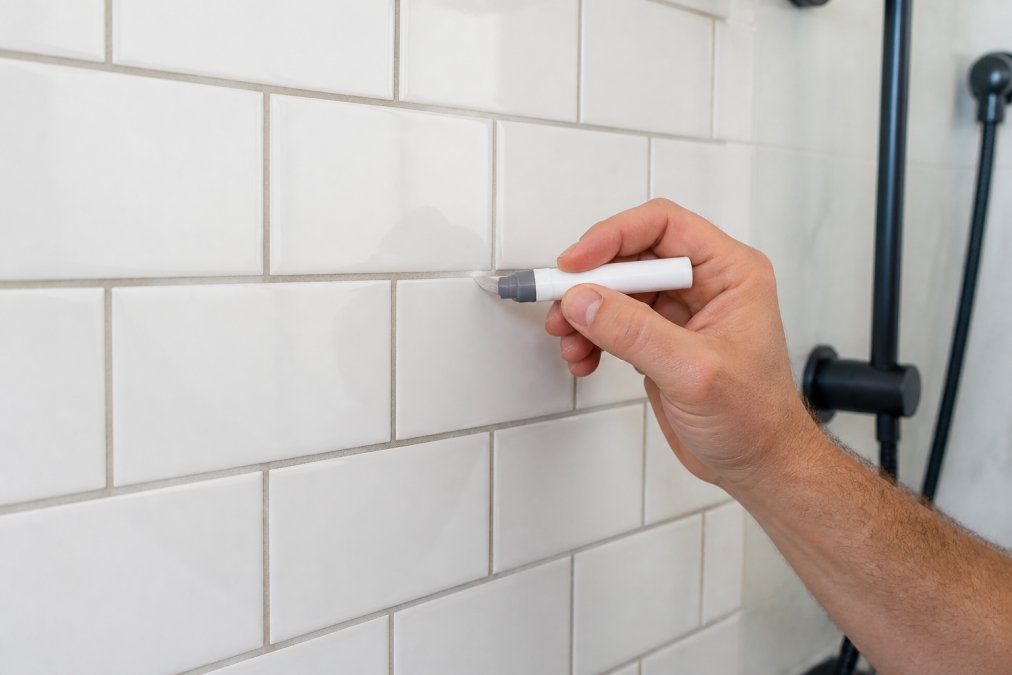
Once your grout is clean and dry, application is straightforward. Take your time and follow the process carefully.
Priming the Grout Lines
Primer creates a uniform base for your colorant. It fills small gaps and improves adhesion. Without primer, colorant can absorb unevenly into the porous grout, resulting in patchy color or poor durability.
Applying the Colorant
This is where your grout gets its new color. Use a grout pen or applicator brush to apply colorant directly into the grout lines. Work in small sections, filling each line completely without overfilling.
Sealing for Moisture Resistance
A sealer protects your colorant and extends its lifespan. It creates a moisture barrier that prevents water from penetrating the grout and compromising the bond between colorant and grout.
The three-step process, prime, colorant, seal, is what separates a finish that lasts years from one that fails in months. Each step matters equally.
How Long Does Grout Colorant Last
Durability depends on several factors: product quality, surface preparation, application technique, and how much moisture the grout is exposed to.
Factors that extend lifespan:
- Excellent surface preparation, clean, dry grout bonds better and holds colorant longer
- Proper sealing, a quality sealer protects the colorant from moisture and UV exposure
- Good ventilation, reducing humidity in your bathroom slows degradation
- Regular maintenance, wiping down grout lines after showers prevents mold and extends the finish
Factors that shorten lifespan:
- Poor ventilation, constant moisture exposure breaks down the colorant faster
- Harsh scrubbing, aggressive cleaning can wear through the finish
- No sealer, unsealed colorant is more vulnerable to moisture and staining
- Low-quality products, cheaper colorants don’t bond as well and fail sooner
Common Mistakes to Avoid
Learning from others’ mistakes saves time and money. Here are the pitfalls most people encounter.
Pros and Cons of Grout Paint vs. Re-Grouting
Understanding the trade-offs helps you decide which approach makes sense for your situation.
Grout paint pros:
- Fast and affordable compared to re-grouting
- Covers severe stains and discoloration completely
- Wide range of colors available
- DIY-friendly for homeowners
- Results visible immediately after application
Grout paint cons:
- Can peel or flake if surface prep isn’t perfect
- Requires reapplication every few years
- Moisture exposure can cause failure
- Not ideal for loose or crumbling grout
Re-grouting pros:
- Permanent solution if done correctly
- Repairs structural issues in grout lines
- No risk of peeling or flaking
- Best for severely damaged grout
Re-grouting cons:
- Expensive and labor-intensive
- Requires professional installation in most cases
- Time-consuming (can take days or weeks for a bathroom)
- Disruptive to your daily routine
- Overkill if grout is structurally sound but just discolored
| Step | Duration | Key Point |
|---|---|---|
| Cleaning and prep | 2-3 hours | Allow 24-48 hours drying time |
| Primer application | 1-2 hours | Let dry per product instructions |
| Colorant application | 2-3 hours | Apply thin coats, multiple layers |
| Sealing | 1 hour | Wait 48-72 hours before water exposure |
| Total project time | 4-6 hours active work | 3-5 days including curing |
Frequently Asked Questions
Is painting your grout a good idea?
Painting shower grout works well as a temporary refresh when grout lines are stained or discolored, especially for budget-conscious homeowners. It’s faster and cheaper than re-grouting. However, grout paint requires proper surface preparation and maintenance to prevent peeling. It’s ideal for cosmetic updates before selling or refreshing tired bathrooms, but won’t solve structural grout problems. Success depends on using the right product for your grout type and climate conditions.
How long does grout colorant last in a wet shower environment?
Quality grout colorant typically lasts 3-5 years in shower environments with proper application and sealing. Durability depends on moisture exposure, ventilation, cleaning habits, and the product’s waterproof rating. Factors like mildew resistance and adhesion to the grout surface affect longevity. Applying a sealer after curing and maintaining good bathroom ventilation extends the finish significantly. Professional-grade products designed for wet areas perform better than generic paint.
Can you use regular paint on shower grout?
No, regular paint is not suitable for shower grout. Bathrooms create constant moisture, humidity, and temperature changes that standard paint cannot withstand. Grout-specific colorants and paints are formulated with waterproof properties, adhesion agents, and mildew resistance. They bond properly to porous grout surfaces and flex with grout movement. Using regular paint will result in peeling, flaking, and failure within weeks. Always use products specifically designed for grout in wet environments.
What’s the difference between grout paint and grout stain?
Grout paint sits on top of the grout surface as a coating, while grout stain penetrates into the porous grout material. Paint offers better color coverage and is easier to apply with visible results immediately after curing. Stains provide a more natural appearance and better adhesion since they bond chemically with the grout. Paint works better for covering dark stains or dramatic color changes; stain is ideal for subtle color adjustments and blends more naturally with existing grout. Both require proper preparation and sealing for durability in wet areas.
The post Can You Paint Shower Grout? A Step-by-Step Guide appeared first on Grout Shield | Grout Restoration System | Grout Cleaner.